Showing posts with label kitchen. Show all posts

6.11.2014

Kitchen Update - Aint No Party Like An Island Party

Pin It Print Friendly and PDF

Ladies and gentleman, you're invited to the island party!
Location: In My Kitchen
Date and Time: All Day, Everyday 

This kitchen update was (kind of) free, extremely convenient, and very, very functional. The "kind of" free part includes reusing an old piece of furniture we didn't think we would need again.

When we lived in Chicago, we purchased a kitchen island. We wanted to have a non-permanent piece (we were renting) that would give a focal point to our kitchen and provide a space for people to congregate around.

We ended up purchasing the "Threshold Kitchen Island" from Target. It was (and still is) an unbeatable price at $249 plus my wonderful mother's 10% Target discount for having a Target Red card.


On top of the price, we loved the hidden storage. While open-shelving kitchen islands are pretty, this one offers a way to store things out of sight, and the inside drawers even pull out, in case you are putting something heavy on it.

Additionally, the "bar" side of the island can be extended or folded down (it's up in the picture above, and down in the picture below), which gives you the option of having a two person breakfast bar in your kitchen.


When we moved out of our Chicago apartment, we had a little debate over whether or not to keep it. We weren't sure if it would fit with the rest of our mid century furniture, and we didn't envision needing it. But, I assured my husband that, even if it wasn't in a kitchen, it could be a temporary piece in a guest bedroom or office. If you put the bar flap down, it seems a bit like a short dresser.

Little did we know how handy it would turn out to be.


When we bought our new house, we realized it would fit perfectly. Between the simple white cabinets and the butcher block top, it was going to be a perfect or almost-perfect fit for the space, without us having to shell out any cash.


Once the island was set in the middle of the kitchen and our dishes and other appliances were put in place, we transformed this room into a functional work space that allows multiple chefs to be in the kitchen at once. It made a huge difference in the amount of counter space we have to work with.


Another thing I love about this island is that it allows my husband to be sitting/drinkingcoffee/eating at the counter while I am still moving around in the kitchen. This house has a separate kitchen and dining room, so we would have otherwise spent a lot of mornings with me making my breakfast in the kitchen while he is eating or drinking coffee in the dining room.

Instead, we can enjoy the morning coffee/breakfast ritual together, in the same room. Huzzah!


For the sake of comparison, here are some before-and-after shots of the stove and island transformation.


Quick Note: These "before" pictures also leave out the much more fitting stainless steel stove/oven we purchased. If you missed that, you can check it out here.


WHAT ABOUT YOU?
  • What do you think about the change?
  • Do you like kitchens with islands, or do you prefer to keep the space open?
  • What do you do with all of your kitchen appliances? Clearly mine are sitting out on the counter, because I use them a lot, but I'm trying to figure out a cleaner way to display them.

5.27.2014

Installing A New Stove - Goodbye Ole Whitey

Pin It Print Friendly and PDF
We have now officially been in this house for a week, and the tweaks have already begun.

At first, we thought we may be able to hack it with the old white stove for a little while. The rest of the appliances are stainless steel, so despite wanting a new stove to match that, we weren't sure we could justify buying a new one for purely cosmetic reasons when there are other, bigger projects calling us (I'm preparing to go at the bathroom with a freaking hammer).


But, there's always a contingency clause, and for us, keeping Ole Whitey was contingent upon cleanliness and functioning. Unfortunately (or fortunately?), Ole Whitey ended up with a few issues...

First, the clock didn't work. We tried setting it a few times and it would seem to work but then the next morning it would be back to flashing --:--. <--what's up with that?

Second, it was missing a rack inside (it had only one), meaning we could only cook one thing at a time. I need a high functioning oven because I like to cook ALL THE THINGS. We could probably have bought some new racks, but it felt like 'polishing a turd' to do that. You can fancy it up all you want, but it's still a stinking turd.

I can't believe I am referencing turds on my blog.


Third, it's an old stove, so it was DIRRRRRTY inside (see above). Could we have cleaned it? Yes. Did we want to clean the heck out of a stove with problems #1 and 2? Nope.

After a while, my husband managed to convince me we needed to just buy a new stove. I was on the fence about it for a while, but he kept reminding me that I use the stove at least once a day (usually twice, but who's counting?!), so it would not only be a good investment for the kitchen, but also a good investment into my daily experience.

The fact that I resisted for a while still amazes me. You want to buy me a new stove? Twist my arm already!


We ended up ordering a new one from Best Buy. We wanted something stainless, gas-run, and with burners that have varying intensities. There is not a lot of space for the stove in this kitchen, so we replaced it with the same size we had before, which is 30 inches.

Our dishwasher is GE, and we ended up getting the same brand for the stove, but it was somewhat unintentional.


Why did we go with Best Buy? They had the best deal on the stove we wanted, they offered free delivery, and they were willing to recycle the old stove.


They delivered the stove a few days later, but it was up to us to actually hook it up. We turned off the gas and got to work, and it ended up being pretty simple: Just attach the gas to the new stove (it screws in; ours had an adapter we removed from the old stove and kept), seal it, and plug the stove in to the wall (aka get power). Then, all you have to do is scoot it into place without scratching your floor.


Now that it is in place, I am in love with it. It really did make a huge difference both visually and functionally, and I think it helps the kitchen look a bit more "grown up" and cohesive.


The design of the stove also helps hide a design oddity of our kitchen. Because the top of the new stove is curved/domed instead of flat, it doesn't make it as obvious that the stove, itself, is actually overlapping somewhat with the doorway trim. We have considered doing a renovation to shave off some of the counter/cabinet space in order to get rid of this overlap, but at this point, it seems like a lot of cost for a somewhat minor issue, so this was a nice tweak for the meantime.


There is also a neat feature on this stove that will allow me to very efficiently heat my huge pots - such as my large oval le creuset. In the center, there is a tall, oval burner that will be perfect for those kind of crockpot-like shapes.


 And there you have it. So far, so good. Now, let me get back to cooking...

WHAT ABOUT YOU?
  • Do you think it is a big improvement?
  • Have you ever replaced a stove?
  • What "changes" do you think go the farthest in updating a kitchen?


5.15.2012

Hanging Pot Racks (Probably The Best Deal I'll Get All Year...)

Pin It Print Friendly and PDF

Tiny kitchens are the worst. After a hilarious episode of House Hunters in Minneapolis, I've now re-coined the term "One Butt Kitchen." You know what I'm talking about... those kitchens that are obviously meant for only one butt at a time. Well, that's what we're got to work with. 

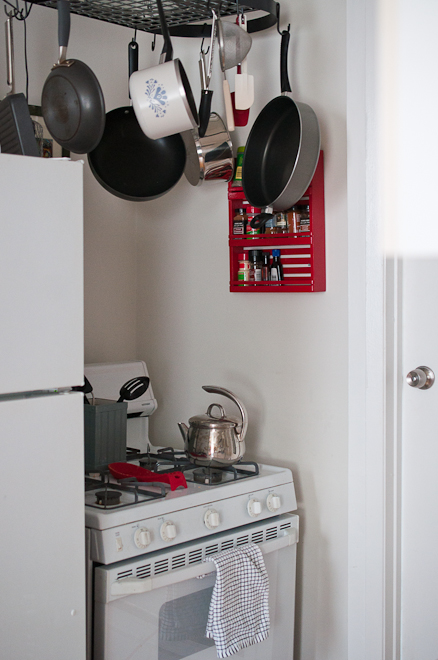
On top of being a "One Butt Kitchen," cabinet space was slim pickin's. We installed a spice rack, shelving, and a hanging rack for coffee mugs under a cabinet... but were still stumped as to how to free up space and make the small space we did have more functional. 

One of the biggest "pain points," so to speak, was the pot-and-pan storage. The under-the-counter cabinet situation involved one large but totally not functional space. This lead to piles of pots and pans and the one you wanted was always squeezed between all the others. Everything was a lot of work... and noise...

...until I found an amazing deal. I ordered this Innova Classicor Wrought Iron Oval Pot Rack (yes, that's its full name. Sort of like Prince Edward VanHalen Lichtenstein the Third) for under 40 bucks.

We installed it by putting in four hook screws, then hanging the fixture from a large chain.

Before & After:


And of course, I had to grab a shot from underneath. I feel like I should be cooing like a little baby, staring up at my pretty little big mobile.


The light we had initially hung over the stove is now somewhat displaced. It's currently hanging along with a rarely used pot... just in case we decide we still want it and want to hang it more "chic"-ly from the rack. Any suggestions? :)


5.14.2012

Making Over The Tiniest Kitchen In The World

Pin It Print Friendly and PDF

Perhaps you recall when we gave Justin's Wicker Park apartment an overhaul... At the time, we did nothing to the kitchen. We were stumped, to say the least. There was no storage. Hardly any shelving. No place for spices or pots and pans. 

Before:


The cabinets you DO see are filled with cups and plates... and the cabinets underneath the sink have no shelving or layering. Just one big space under there. So that means your food would be next to your under-the-sink garbage bin and cleaning supplies. Yuck? I think so!


Progress:


To deal with the shelving and storage problem, we decided to add some storage of our own. We added a bright red spice rack, which helped alleviate some of the kitchen stress... and, for a bit of fun, we smacked up a piece of art that mimics the bright red.  


We also added a few shelves above the sink, which we picked up at an antique store in Holland, Michigan. The industrial-looking silver shelves can hold a few odds and ends, like coffee grounds, paper towels, and an awesome non-aerosol olive oil spritzer.


Adding a super cheap (thanks, online shopping!) under-the-counter mug rack also freed up some space in the cabinets (while also helping play off of that mustard yellow color). I grabbed it online for 11 bucks and it arrived within two days. Semi-instant gratification? Thanks, internet (I mean Al Gore).


So, using a thrifted spice rack, antique silver shelves, and a cheapo under-cabinet organizer, we had freed up lots of space and organized as much as we thought we could. Yet, there was still a big problem. The new most obnoxious thing (because as soon as you eliminate one nuisance, another one pops up to take its place) was the clambering noise of pots and pans.

Every single time I wanted to cook, I had to wrestle (yes, wrestle) the appropriate pot or pan from an under-the-sink cabinet. Not only did I have to "get low" (sure, I'm only 23, but getting down on your hands and knees to cook is just obnoxious), but, inevitably, that the pan I wanted would always be stuck in between all of the others. Right in the middle. The most inaccessible place. It's Murphy's law... or perhaps his first cousin. Anyway, piles were spilled. Pots knocked other things over. Nothing was organized. And my brain was screaming.

And then I had a dream. Wouldn't it be splendid if, instead of being stacked 10 pots high, the pots and pans were hanging? It came just like a dream to me. To have pots and pans hanging from above, easily plucked like grabbing an apple from a tree?! It must be the kitchen version of the Garden of Eden! Can it exist?

Oh, that's right. Such a thing does exist! It's called a pot rack! For $39.42!
Come back tomorrow to see how it looks :)

5.07.2012

Put It On A Shelf

Pin It Print Friendly and PDF
What's the best way to get organized in a small apartment? Get as many spaces and surfaces as you can! Remember our mission to thrift? Our main goal when left that day was to find a bedside table, but we came up short there, and wound up long in the shelving department, and we decided to put those awesome shelves in Justin's apartment. And the kicker? (Cue the heavenly music, please)... they were a piece of cake to install!


Here I am, on the beautiful, fateful day I first eyed my silver shelves... Now, cue the background music, "Silllver shelves.... Silllllvvverrr shhellllvesssss... It's thrifting timmeee in the cityyyyy..." Come on. You totally enjoyed that.

We purchased these shelves without an actual plan for where to put them (but at $12 for all 3 shelves, can you blame us?!).  I considered putting them in the bedroom, which is shaping up to look quite beautiful manly...  but, ultimately, I think I finally realized two things:

Thing Number One:
We all have a part of our apartment or home that is just plain crappy. 

Thing Number Two:
When you love a new piece of furniture, you want to put it in the room you love... but you should put it in your --- you guessed it --- crap room.

What does this mean? It means we decided to put the shelves in the kitchen. The crooked cabinets, old school (and not in a good way) counter top, and please-throw-me-out appliances needed some beautiful company.

We decided to put them above the kitchen sink. There was a large space on the wall, right above the sink, that wasn't being used. The ratio of kitchen items to drawer and cabinet space was depressing (note: that means many kitchen items and very little drawer/cabinet space), so it seemed to make sense to add some beautiful silver (err, I mean manly and industrial) shelves.

In the end, the space looks much better and we've finally got some functional space... not to mention something for our eyes to ponder as we do the dishes.

What we used:
  • Shelves
  • Level
  • Drywall Anchors
  • Screws and washers

We Came. We Saw. We Conquered.
 Or... We eyeballed. We measured. We Hung.

We eyeballed a location for the shelves
We weren't very methodical, we just thought about what we could put on them, and how much height  we would need on top and in between
We measured
Center the shelves between the cabinets
With the level on the shelf, mark the location for the anchors

We hung
Screw the anchor into the wall (Tip: line up the shelf after the first anchor to make sure your mark for the second one still lines up)
Put the washers on the screws
Bolt the screws into the anchor


See how they look as though they're not centered? Let's take this as a teaching moment for a typical old Chicago apartment... the cabinets are not centered above the sink. Thus, neither can the shelves.


Related Posts Plugin for WordPress, Blogger...
Blogging tips